上,中两篇以及创建实现人脸识别的系统以及百度的人脸识别接口。本篇介绍如果拥有树莓派硬件以及摄像模组利用硬件识别和利用vmware虚机系统识别,以及两个的区别
1,Raspbian pi系统部署百度模块(硬件/虚拟机都适用)
创建应用后下载百度SDK模块
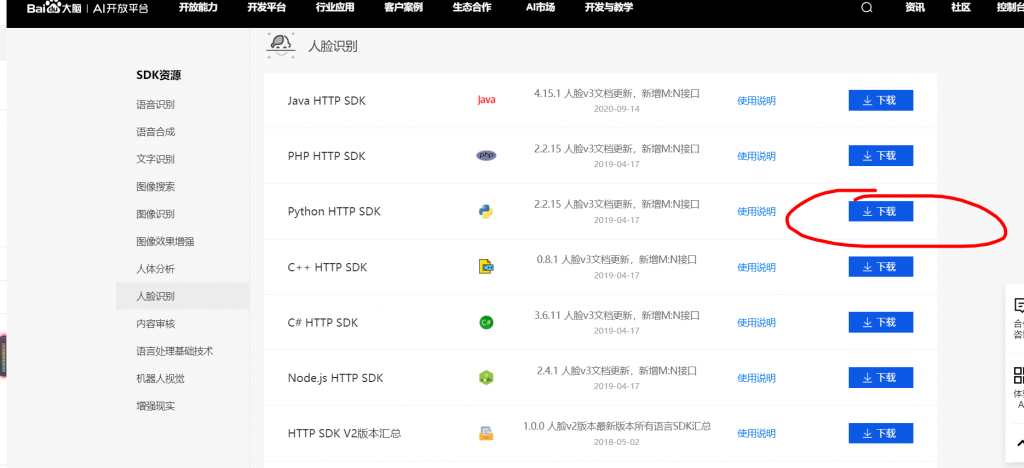

2.1 sdk传输至树莓派上
把下载好的SDK压缩包解压,可以通过ftp或者smb的方式,把下载的SDK文件传输到到树莓派该目录下,然后cd进入该目录;
2.2 安装pip以及setuptools
如果你的树莓派以及安装好了这两款软件,直接跳至2.3,如果还没,可以按一下步骤安装这两款重要的软件;
2.2.1 安装setuptools
到官网(https://pypi.org/project/setuptools/)
a)下载 setuptools 安装包
wget https://files.pythonhosted.org/packages/37/1b/b25507861991beeade31473868463dad0e58b1978c209de27384ae541b0b/setuptools-40.6.3.zipb)解压缩
unzip setuptools-40.6.3.zipc)安装
cd setuptools-40.6.3
sudo python setup.py build
sudo python setup.py install
2.2.2安装pip
1)下载
到官网(https://pypi.org/project/pip/)下载pip安装包
cd ..
wget https://files.pythonhosted.org/packages/45/ae/8a0ad77defb7cc903f09e551d88b443304a9bd6e6f124e75c0fbbf6de8f7/pip-18.1.tar.gz
2)解压
tar zxvf pip-18.1.tar.gz3)安装
cd pip-18.1
sudo python setup.py install
2.3安装人脸识别SDK
当你的树莓派装好pip以及setuptools之后,cd到树莓派的SDK目录下,执行一下命令:
cd ..
unzip (SDK包名)
pip install baidu-aip
python setup.py install即可完成SDK本地模块安装
2,硬件pi调用
本地新建python文件test.py
from aip import AipFace
from picamera import PiCamera  #调用硬件摄像头模组
import urllib.request
import RPi.GPIO as GPIO    #树莓派引脚调用
import base64
import time
#百度人脸识别API账号信息
APP_ID = 'xxxxxxxxxxx
API_KEY = 'xxxxxxxxxxxxx'
SECRET_KEY ='xxxxxxxxxxxxxxxx'
client = AipFace(APP_ID, API_KEY, SECRET_KEY)#创建一个客户端用以访问百度云
#图像编码方式
IMAGE_TYPE='BASE64'
camera = PiCamera()#定义一个摄像头对象
#用户组
GROUP = 'xxxxxxxxxxx'

#照相函数
def getimage():
    camera.resolution = (1024,768)#摄像界面为1024*768
    camera.start_preview()#开始摄像
    time.sleep(2)
    camera.capture('image.jpg')#拍照并保存
    time.sleep(2)
#对图片的格式进行转换
def transimage():
    f = open('image.jpg','rb')
    img = base64.b64encode(f.read())
    return img
#上传到百度api进行人脸检测
def go_api(image):
    result = client.search(str(image, 'utf-8'), IMAGE_TYPE, GROUP);#在百度云人脸库中寻找有没有匹配的人脸
    if result['error_msg'] == 'SUCCESS':#如果成功了
        name = result['result']['user_list'][0]['user_id']#获取名字
        score = result['result']['user_list'][0]['score']#获取相似度
        if score > 80:#如果相似度大于80
            if name == 'yusheng_02':

                print("欢迎%s !" % name)
                time.sleep(3)
            if name == 'xiaoming':
                print("欢迎%s !" % name)
                time.sleep(3)
            if name == "xiaoyu":
                print("欢迎%s !" % name)
        else:
            print("对不起,我不认识你!")
            name = 'Unknow'
            return 0
        curren_time = time.asctime(time.localtime(time.time()))#获取当前时间

        #将人员出入的记录保存到Log.txt中
        f = open('Log.txt','a')
        f.write("Person: " + name + "     " + "Time:" + str(curren_time)+'\n')
        f.close()
        return 1
    if result['error_msg'] == 'pic not has face':
        print('检测不到人脸')
        time.sleep(2)
        return 0
    else:
        print(result['error_code']+' ' + result['error_code'])
        return 0
#主函数
if __name__ == '__main__':
    while True:
        print('准备')
        if True:
            getimage()#拍照
            img = transimage()#转换照片格式
            res = go_api(img)#将转换了格式的图片上传到百度云
            if(res == 1):#是人脸库中的人
                print("开门")
            else:
                print("关门")
            print('稍等三秒进入下一个')
            time.sleep(3)
将test.py文件上传到baidu目录下
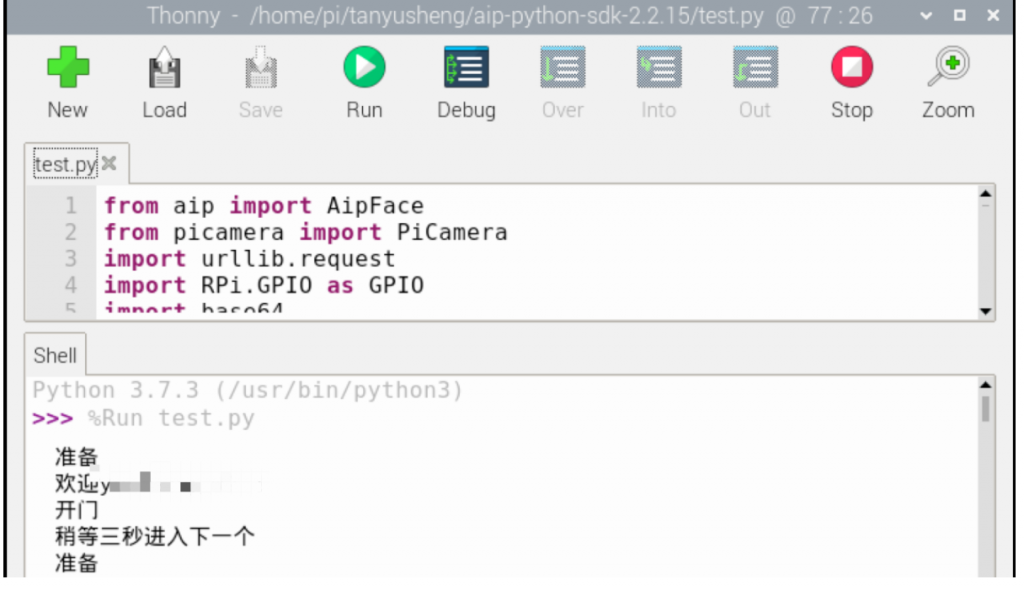
虚拟机调用
因为虚拟机没有树莓派的摄像模组且摄像头是通过串口连接的 本地虚拟机只能调用usb连接的电脑摄像头
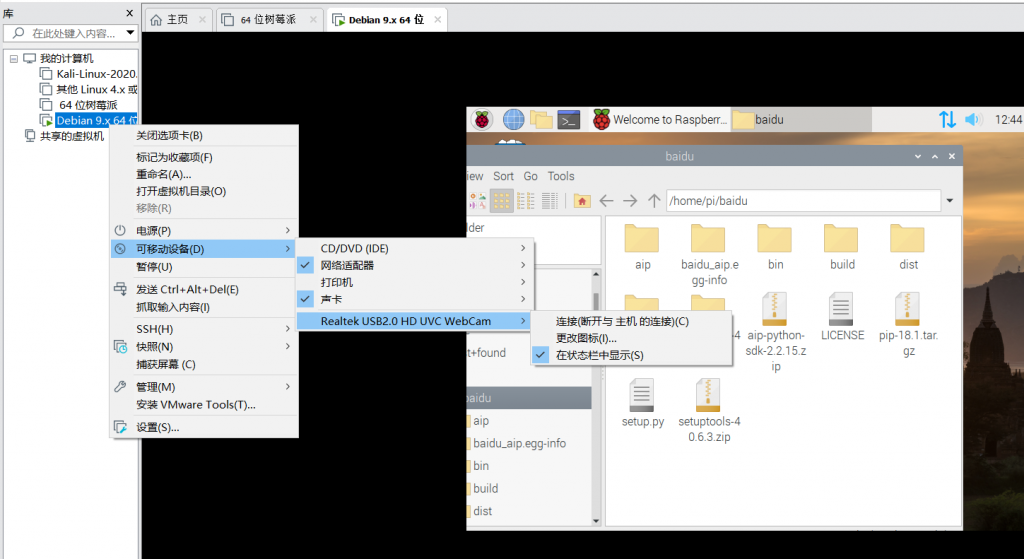
因此test.py中的引入语句
from picamera import PiCamera  #调用硬件摄像头模组
import RPi.GPIO as GPIO    #树莓派引脚调用
以及
#照相函数
def getimage():
    camera.resolution = (1024,768)#摄像界面为1024*768
    camera.start_preview()#开始摄像
    time.sleep(2)
    camera.capture('faceimage.jpg')#拍照并保存
    time.sleep(2)
是无法使用的
但是系统中有一个fswebcam函数可以用来调用USB方式连接的摄像头
安装fswebcam组件
sudo apt-get install fswebcam需要的包
import os
import sys
import re
调用照相函数
os.system("fswebcam 摄像像素参数 image.gpg")完整test.py文件
from aip import AipFace
import urllib.request
import base64
import time
import os
import sys
import re

#百度人脸识别API账号信息
APP_ID = '23527604'
API_KEY = 'OSfcZI2IFyDuQ9zyIuZL7xMw'
SECRET_KEY ='1O4aer1HlZUjFV5g1Swp2sSIP4M05FIn'
client = AipFace(APP_ID, API_KEY, SECRET_KEY)#创建一个客户端用以访问百度云
#图像编码方式
IMAGE_TYPE='BASE64'
#用户组
GROUP = 'test'

#照相函数
def getimage():
   os.system("fswebcam --no-banner -r 1080x720-S image.jpg")
#对图片的格式进行转换
def transimage():
    f = open('image.jpg','rb')
    img = base64.b64encode(f.read())
    return img
#上传到百度api进行人脸检测
def go_api(image):
    result = client.search(str(image, 'utf-8'), IMAGE_TYPE, GROUP);#在百度云人脸库中寻找有没有匹配的人脸
    if result['error_msg'] == 'SUCCESS':#如果成功了
        name = result['result']['user_list'][0]['user_id']#获取名字
        score = result['result']['user_list'][0]['score']#获取相似度
        if score > 80:#如果相似度大于80
            if name == 'ljw':

                print("欢迎%s !" % name)
                time.sleep(3)
            if name == 'xiaoming':
                print("欢迎%s !" % name)
                time.sleep(3)
            if name == "xiaoyu":
                print("欢迎%s !" % name)
        else:
            print("对不起,我不认识你!")
            name = 'Unknow'
            return 0
        curren_time = time.asctime(time.localtime(time.time()))#获取当前时间

        #将人员出入的记录保存到Log.txt中
        f = open('Log.txt','a')
        f.write("Person: " + name + "     " + "Time:" + str(curren_time)+'\n')
        f.close()
        return 1
    if result['error_msg'] == 'pic not has face':
        print('检测不到人脸')
        time.sleep(2)
        return 0
    else:
        print(result['error_code']+' ' + result['error_code'])
        return 0
#主函数
if __name__ == '__main__':
    while True:
        print('准备')
        if True:
            getimage()#拍照
            img = transimage()#转换照片格式
            res = go_api(img)#将转换了格式的图片上传到百度云zz
            if(res == 1):#是人脸库中的人
                print("开门")
            else:
                print("关门")
            print('稍等三秒进入下一个')
            time.sleep(3)
运行该程序即可

fswebcam函数拍出的照片会实时储为image.jpg文件后上传百度进行对比

ping百度api地址为
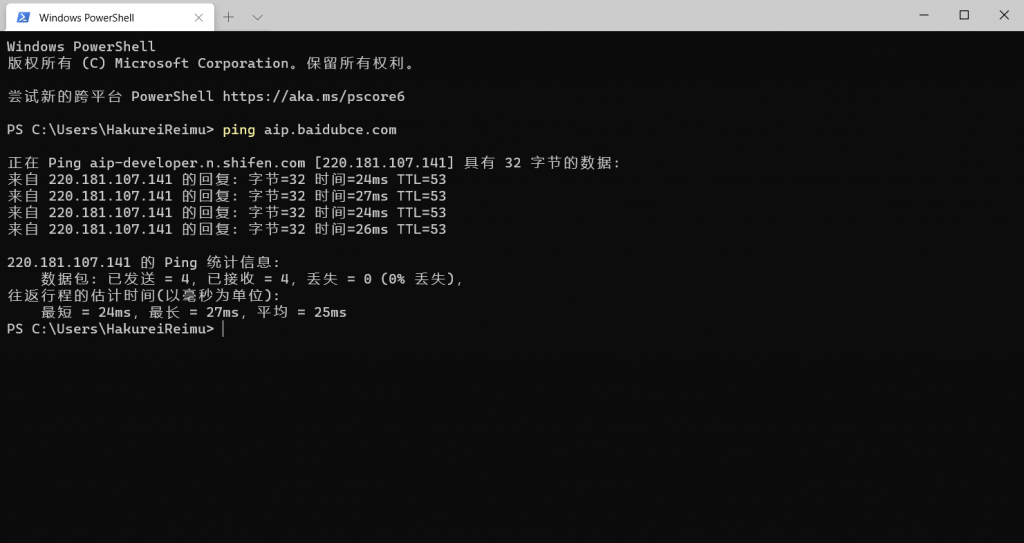
抓包后发现
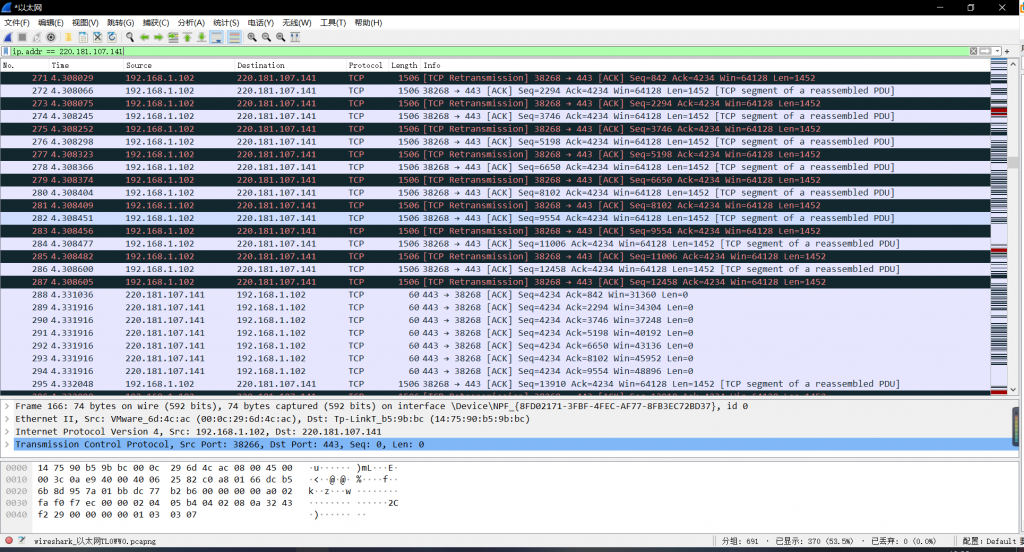
vmware虚拟机网络与该ip发生了数据交换
查看百度SDK调用统计
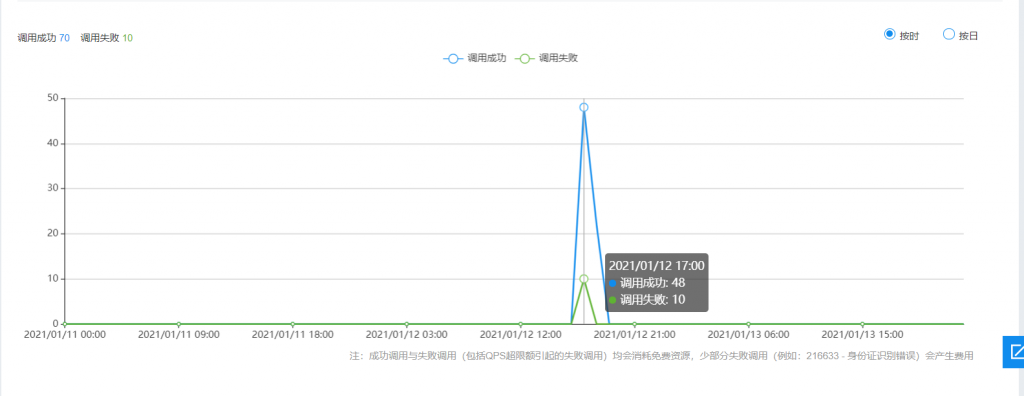
证明项目确实部署成功

发表回复